
Piping and plumbing
Radiant tubing gets one chance.
Once the slab is poured, the tubing is where it is for the life of the building. Layout, spacing, fastening and the pressure test before the pour are the whole job.
Why radiant feels different
A forced air system heats the air and lets the air heat you. Radiant heats the surfaces, and the surfaces heat you directly. That difference is why a radiant room at 68 degrees feels warmer than a forced air room at the same number, and why the comfort holds steady instead of cycling with the fan.
It also means no moving air, which matters more in some buildings than others. No draft, nothing blowing dust around, and no fan noise. In a lab, a clean area or a space where air movement is controlled for other reasons, that can be the deciding factor rather than a nice extra.
The trade-off is response time. A heated slab has enormous thermal mass, which is what makes it stable and also what makes it slow. Radiant is not the right answer for a space that needs to change temperature quickly or that sits empty most of the week.
What California actually limits
Radiant is governed in California under California Mechanical Code Chapter 12, Hydronics, and the limits are specific enough to be worth knowing before anything is designed.
CMC 1201.2 sets a general rule for hydronic systems: surfaces within reach of building occupants shall not exceed 140 degrees Fahrenheit.
For floors, CMC 1217.2 is more specific, and caps the finished floor surface temperature for space heating:
- 85°F in general occupied applications
- 90°F in bathrooms, foyers, distribution areas such as hallways, and indoor swimming pools
- 88°F in industrial spaces
- 95°F in radiant panel perimeter areas, meaning within about two and a half feet of outside walls
The same section requires the system temperature not to exceed the maximum rating of the materials it is built from, which is the provision that quietly governs tubing and manifold selection.
Those caps are a design constraint, not a formality. They set a ceiling on how much heat a given floor area can deliver, which means a poorly insulated space may simply not be heatable by floor radiant alone. Finding that out during design is cheap. Finding it out the first cold week after occupancy is not.
Insulation under the slab is not optional in practice. Heat moves in every direction, and a slab without insulation beneath it heats the ground. The tubing cannot tell the difference. Underslab insulation is what makes the system's output go upward into the room, and it is the one thing that genuinely cannot be added later at any price.
The pour is the deadline
Everything about a slab radiant installation is organized around one irreversible moment. Before the pour, a mistake is an hour of work. After it, it is a concrete saw and a bad week.
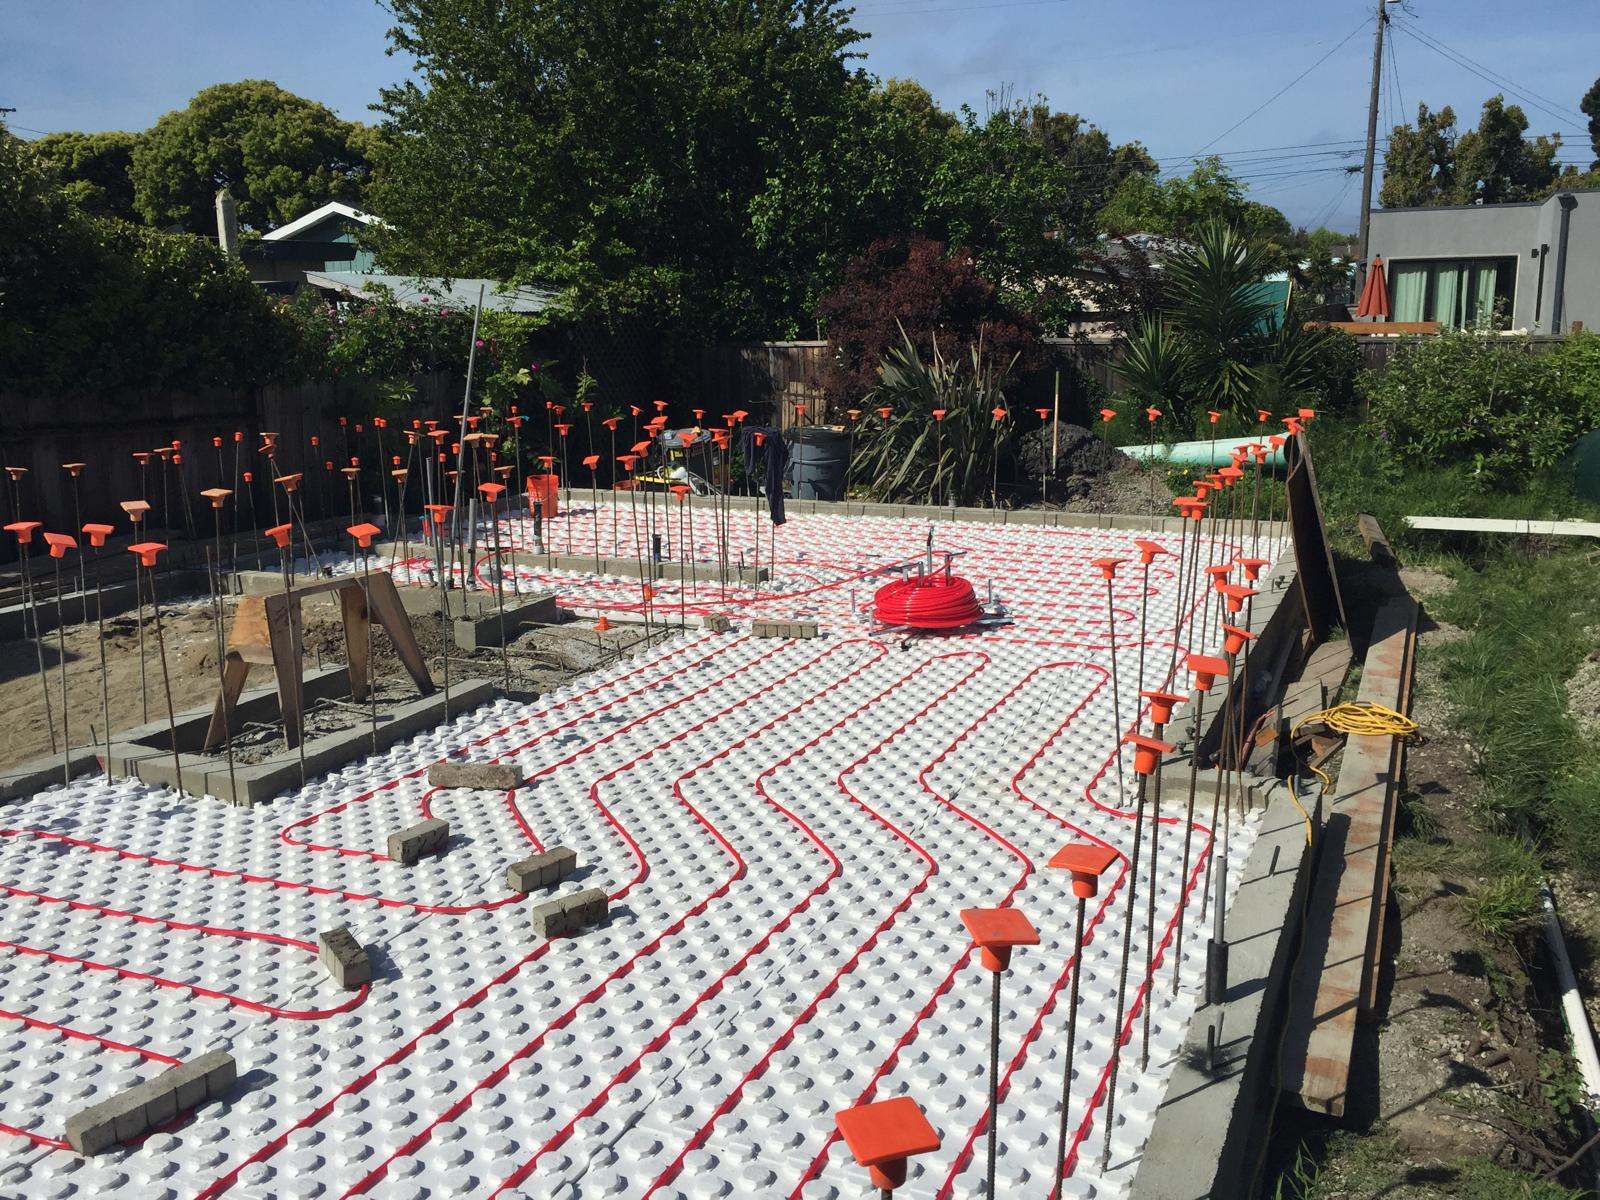
Which is why the sequence runs the way it does. Underslab insulation goes in first, then the tubing is laid out to the design spacing and fastened so it cannot float or shift when concrete lands on it. Spacing tightens at the perimeter where heat loss is highest, which is also where the code allows the higher surface temperature. Tubing is routed to manifold locations that are accessible for the life of the building, not wherever is convenient on the day.
Then the system is pressurized and held under pressure through the pour, with the gauge visible. Not tested and released. Held. A gauge that is still reading when the concrete truck leaves is proof that nothing was punctured by a boot, a rebar chair or a screed. A system tested the day before and depressurized tells you nothing about what happened during placement.
Where radiant installations go wrong
In our experience the failures cluster in a few places, and almost all of them are decided before anyone turns the system on.
No underslab insulation, covered above, which quietly halves the useful output.
Inaccessible manifolds, buried behind finished work. Manifolds need balancing, and eventually they need service.
Spacing that ignores the perimeter. Uniform spacing across a room with a large glazed wall produces a cold edge that no amount of thermostat adjustment fixes.
No as-built record of the tubing layout. Someone will eventually drill that floor. A photographed and dimensioned layout before the pour is the cheapest insurance in the entire job, and it takes twenty minutes.
Heating and cooling fighting each other. Where a space has both radiant and another system, controls have to prevent them running against one another. The CMC addresses simultaneous operation of radiant heating and cooling sharing a common space temperature control, and it is worth settling in the controls design rather than discovering it in the first shoulder season.
Scope
- Slab on grade
- Thin slab overpour
- Underslab insulation
- Tubing layout
- Manifolds
- Pressure testing
- Boiler and heat source piping
- Zone valves
- Controls coordination
- As-built layout records
CMC 1217.2
Floor surface temperature limits.
| Application | Maximum finished floor surface temperature |
|---|---|
| General occupied applications | 85°F (29°C) |
| Bathrooms, foyers, hallways and distribution areas, indoor swimming pools | 90°F (32°C) |
| Industrial spaces | 88°F (31°C) |
| Radiant panel perimeter areas, up to 2.5 ft from outside walls | 95°F (35°C) |
| Any hydronic surface within occupant reach (CMC 1201.2) | 140°F (60°C) |
Subsection numbering within CMC Chapter 12 shifts between code editions. We confirm against the edition your jurisdiction has adopted before anything goes on a submittal.
Questions we get asked
Radiant, before you commit to it.
How warm will the floor actually feel?
Less warm than most people expect, and that is correct rather than a shortfall. The code caps a general occupied floor at 85 degrees, which is below skin temperature, so the floor reads as pleasantly neutral rather than hot underfoot.
A floor that feels genuinely warm to the touch is usually running above where it should be, and over time that is hard on the finish as well as on the code compliance.
Can radiant panels do cooling as well as heating?
They can, and the CMC addresses radiant heating and cooling together in the same chapter. The constraint is condensation: run a surface below the dew point of the room and it will sweat, which is unacceptable on a floor and worse on a ceiling panel.
Radiant cooling therefore needs humidity control designed alongside it, and controls that prevent heating and cooling operating against each other where they share a space temperature control. It works well when that is designed in and poorly when it is added on.
What happens if the tubing gets damaged after the pour?
It is repairable, and it is unpleasant. The slab is scanned or the as-built layout consulted, the area is opened, the damaged section is cut out and joined, and the floor is made good.
Which is the argument for two cheap habits: holding pressure visibly through the pour so damage is caught while the concrete is still workable, and photographing the layout with dimensions before it disappears. Most post-pour damage we have seen was done later by someone drilling a floor nobody had a record of.
Can radiant go into an existing building?
Yes, usually as a thin slab overpour above the existing floor, or as panels in the wall or ceiling. The question is almost always height. An overpour adds thickness, and that has to be absorbed at doors, thresholds, stair risers and any transition to an adjoining space.
Those details are worth resolving before the system is priced, because they frequently cost more than the heating work itself.
How is the system tested before the pour?
Pressurized to the specified test pressure, held, and the gauge left visible and monitored through placement. The point is not a single passing reading. The point is continuous evidence across the window when damage actually happens.
We want the concrete crew to be able to see the gauge too. A visible gauge changes how people move around the tubing, which is worth more than any amount of instruction beforehand.
Related
Other scopes we self-perform.
Next step
Get us in before the rebar is tied.
Radiant layout has to be coordinated with the structural and the finish plan, not fitted around them afterward. The earlier we see the drawings the cheaper the system gets.